Drainage 101: Pots With Holes, Cachepots, and How to Avoid Root Rot
Drainage isn’t just “having a hole.” It’s a full system: container choice, potting mix, watering habits, and what you do with the water that comes out. This guide explains how drainage works in real life, how to use hole
TL;DR
For most houseplants, a pot with a drainage hole (and when plant is in a nursery pot!). Cachepots can potentially work, but ONLY IF you remove all excess water. Adding rocks to the bottom doesn’t improve drainage and can hold roots in a too-wet zone. Root rot is almost always about drainage AND watering: excluding soggy mix, pot size, blockage, and water left in a saucer. Your biggest allies: an aerated potting mix, the proper size of pot, clear drainage holes, and only watering when the root zone needs it.
What “drainage” really means (and what it doesn’t)
If you think of your container plant’s drainage as its whole water-and-air system, rather than just the presence of a drainage hole, you’ll better determine where issues lie. A healthy root zone requires both moisture and oxygen, and when potting mix becomes waterlogged, roots cannot function normally. They begin to die back, and the damaged root tissue becomes soft and susceptible to rot organisms.
Good drainage is best defined practically: (1) water will exit the pot freely, (2) the mix will re-aerate after watering, and (3) you are not leaving your container sitting in water long enough for the mix to re-absorb it.
A pot can have a hole and still be poorly draining if the potting mix is compacted, the hole is blocked, or the pot is sitting in a puddle (saucer/tray) for hours or days.
Three common container setups (and when to use each)
Quick comparison: drainage options for indoor and outdoor pots
Pot with a drainage hole (single-pot method)
What it is: Plant is potted directly into a container that has at least one drainage hole
Pros: Most forgiving; easiest to “flush” salts; simplest to diagnose watering issues
Cons: Needs a saucer/tray indoors; can drip outdoors
Best for: Most houseplants and patio containers
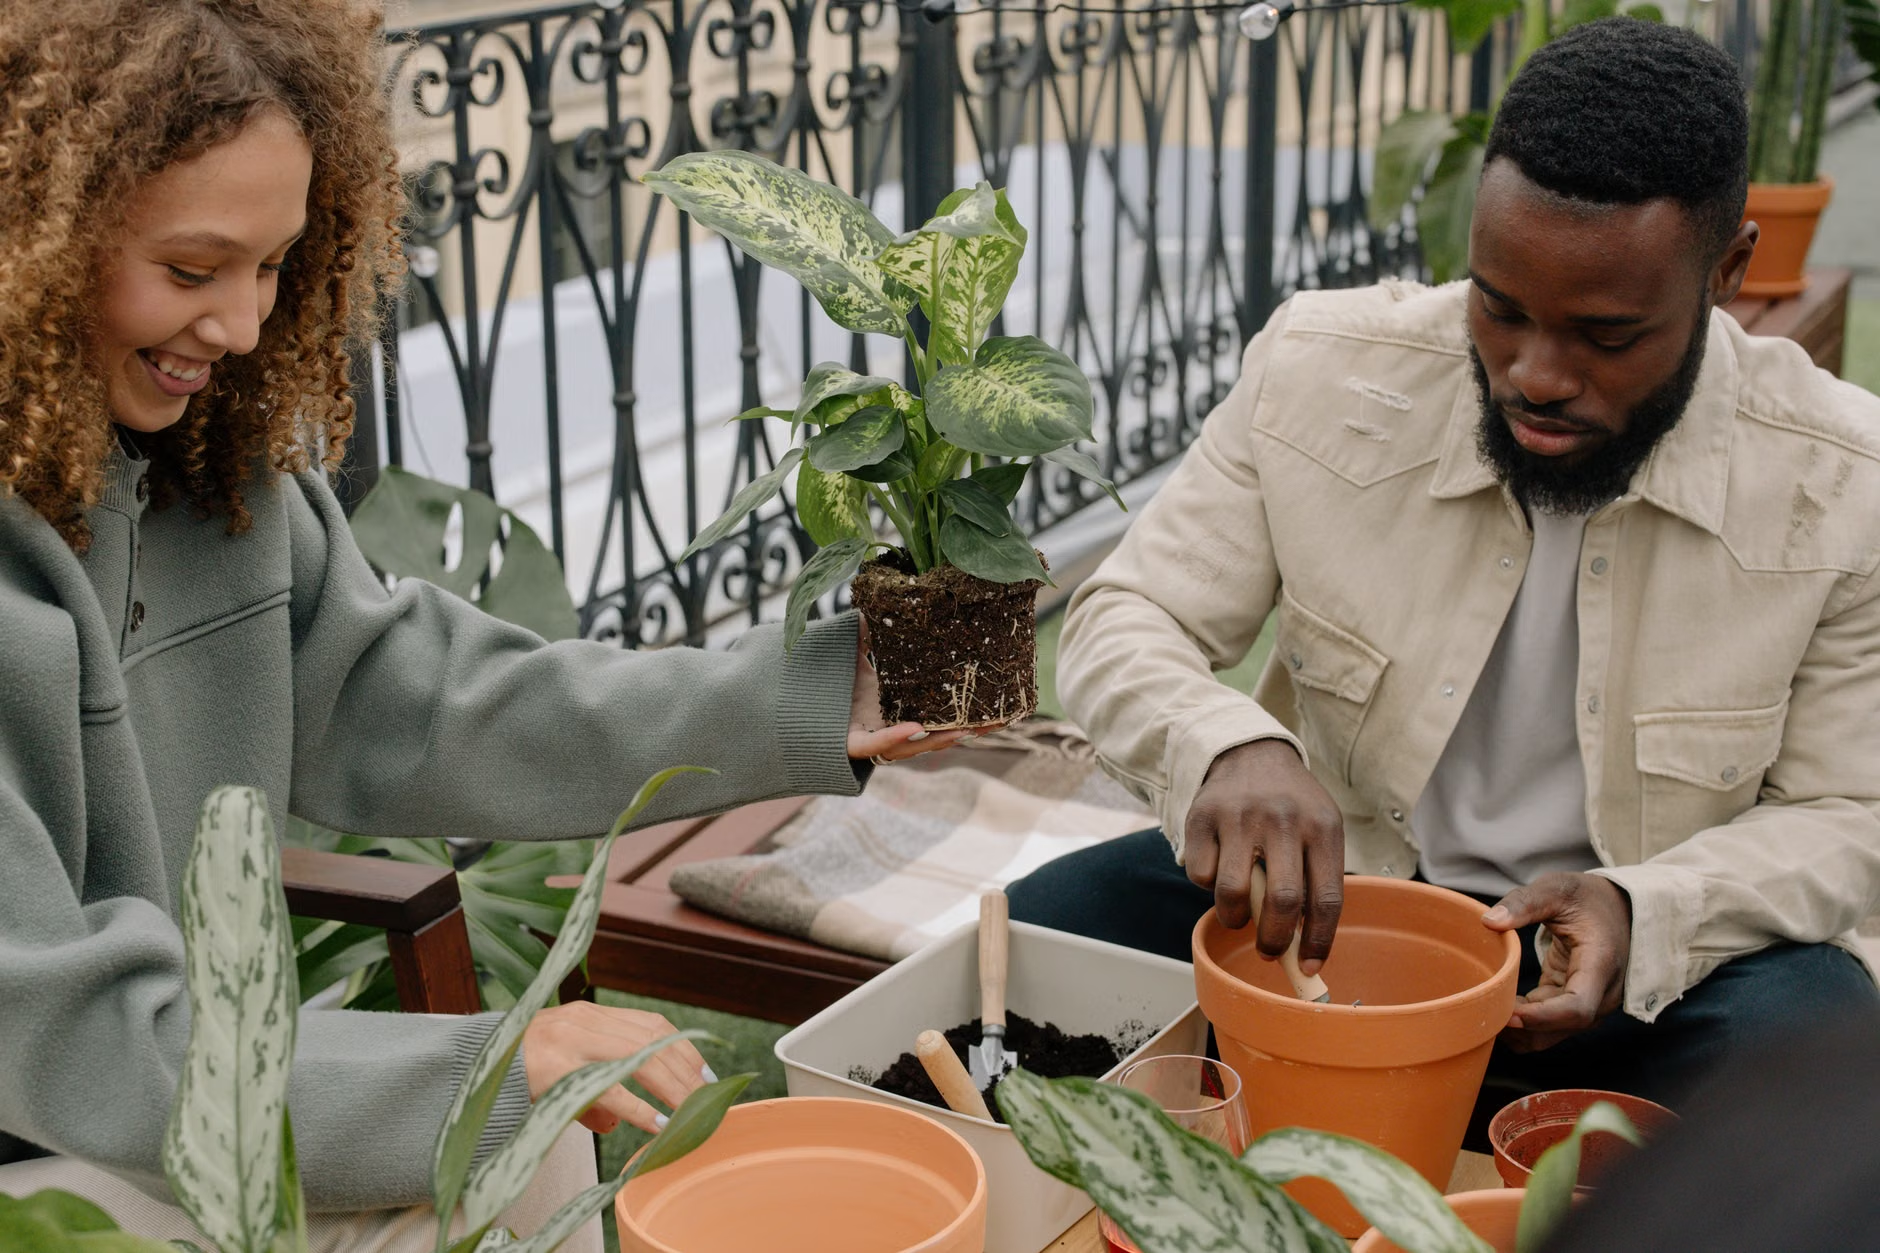
Nursery pot inside a cachepot (two-pot method)
What it is: Plant stays in a plastic nursery pot with holes; that pot sits inside a decorative no-hole outer pot
Pros: Looks clean; easy to remove and drain; lets you keep the safety of a holed pot
Cons: Easy to accidentally leave water pooled in the outer pot
Best for: Decor-forward indoor setups; renters who can’t drill holes
No-hole pot used as the actual planter (not recommended for most)
What it is: Plant is potted directly into a container with no drainage hole
Pros: No drip risk
Cons: High root-rot risk; hard to water correctly; salts build up more easily. Only for very experienced growers or specific water-wicking/self-watering designs
Pots with drainage holes: the safest default
If you’re unsure what to buy, go with a pot with a drainage hole.
It gives you two big advantages:
- You can water thoroughly and let gravity remove the excess—reducing the chance that the entire root ball stays saturated.
- You can periodically “leach” the potting mix (water until some runs out then discard the drainage) to help prevent salt buildup.
Two drainage-hole problems to watch for
- Blocked holes: roots, a compacted mix, or a flat-bottom pot pressed tight to a saucer can prevent water from escaping.
- Standing water: letting the pot sit in a full saucer re-wets the mix from below (the plant may “drink” it back up), which increases the time roots spend without enough air.
Verification habit: after watering, check that water actually exits the drainage hole(s). If nothing drains after a full watering, treat it as a drainage failure until proven otherwise.
Cachepots (decorative pots with no holes): how to use them safely
A cachepot is a decorative outer pot that typically has no drainage hole. Used the right way, cachepots are convenient and stylish. Used the wrong way, they’re basically a hidden bucket around your roots.
- Keep the plant in a nursery pot (or any inner pot) that has drainage holes.
- Place a small spacer in the cachepot if needed (a plastic riser, upside-down saucer, or a few bottle caps) so the nursery pot isn’t sitting flat in drained water.
- Water at the sink (or a watering can over a bowl). Let it drain fully for 10–15 minutes.
- Empty the collected water from your cachepot (or bowl)—not letting the inner pot sit in it.
- Replace the now-drained plant into the cachepot.
If you only remember one cachepot rule: water, wait, then empty. Water left in the bottom can be reabsorbed and keep the root zone too wet.
“Can I just drill a hole in my cachepot?”
Often, yes—and it’s the simplest upgrade. Wood and plastic are usually easy. Ceramic/terracotta varies: some drill cleanly with the right bit and a little patience, while others crack. If you’re not sure, stick with the two-pot method and concentrate on routine draining/emptying.
Saucers, trays and “humidity trays”: friend or foe?
A saucer is a floor protection device—not a water storage tank. Indoors, we are accustomed to watering until a little drains out, then after a brief pause discarding that drainage. Outdoors, it may be standing water is an even larger concern, particularly in the cooler seasons when evaporation takes longer to occur.
Rule of thumb indoors: if you see water in the bottom of the saucer after the pot has finished draining, dump it. Rule of thumb outdoors (especially in the fall/winter): don’t leave pots standing in water; raise them slightly so the holes in the bottom aren’t sealed off against a flat surface.
Why rocks at the bottom don’t fix drainage
Throw gravel or rocks in the bottom of the pot
is an old myth.This doesn’t create “extra drainage,” it reduces how much potting mix your roots actually have access to and can leave a wetter area in the mix above the layer of rock.
Better fix: use a pot with a proper drainage hole, make sure that the hole is clear, and grow in a well-aerated pot mix. If you’re worried about soil washing out, sit a small piece of mesh/screen (or a coffee filter) over the hole—don’t build a layer of rock.
The potting mix matters as much as the pot
Even with perfect holes, a dense or broken down mix can remain boggy. Some mixes compact over time and fine particles settle into air gaps, creating a situation where water hangs around longer than your plant would prefer.
What “well-draining” looks like
• Water should penetrate well (not bead up and start running down the sides of the pot).•
• After watering for a reasonable time soil should feel wet, not like sludge.•
• In a reasonable time for your conditions (light, heat, type of pot) the top inch of soil should dry out and the pot feel noticeably lighter.
The silent killer of roots: overpotting
A pot that is much larger than the rootball is holding more wet mix than roots “drink” out quickly and that unused area shouldered with wet mix is damp and poorly aerated—an easy recipe for root problems. When upsizing do so in only modestly larger containers than the existing root mass (unless you are deliberately planting into a
A watering routine that keeps root rot at bay (most of the time)
One of the tenets of houseplant care that a lot of people tend to say is “water less !" The right approach isn’t, “water less,” but “water when necessary, then give the mix a chance to brace itself again.” Here’s a routine that’s worked for me with most of the commonplace plants you’ll find in homes (modify as necessary based on plant type and your lighting).
- Check moisture where the roots are, not on the surface: stick your finger in 1-2” or a chopstick, or pick the whole pot up and give it a shake so you know how heavy it is (don’t eyeball that dry-looking surface).
- When you do water, do it purposefully; drench it till you hear at least a splash at the drainage hole(s) (that should make sure you’re past the rust layer).
- Let the pot drain for 10-15 minutes.
- Throw out that soupy water sitting there in the saucer/cachepot; don’t leave the pot sitting in it.
- Wait for the mix to dry out again—ideally the portion of the mix your plant prefers to remain dry. (This is species specific of course; in lower light, and should the weather be cool, that might take a heck of a lot longer).
Things to watch in your watering routine: the times of watering should stretch out in winter/in low light and compress in bright light/in heat. If the timings never change, that’s your cue you’re scheduling the calendar not watering the plant.
Root rot: red flags (and what you ought to do, right now)
Root rot usually shows itself in the form of an under-watered plant: limp sad leaves, slow growth. That of course because the roots aren’t moving the water around as thoroughly as they ought to (too much damage). Before you do anything, be sure with a few checks.
1. Smell that soil: is there a sour/rotten smell coming from there? It may be indicative of water-logged rotten roots.
Your pot might feel heavy for days: this can indicate that your mix isn’t drying out (or your pot isn’t draining). Look for leaf symptoms: yellowing, limp leaves, leaf drop—especially if the mix isn’t dry yet. The best confirmation is to inspect your roots: slide your root ball out. Healthy roots are firm to the touch; mushy, rotting roots often turn dark and watery.
What to do:
- No more watering until you “get in there” and check out your root zone! Don’t “add more water” to that wilting houseplant without checking your mix first.
- Remove the plant from its pot and inspect the roots. “
- Trim away mushy basically dead roots with scissors/clean pruners. If that’s not too wet, see if your plant will fit in a smaller container, so repot into fresh, good draining potting mix in a pot with drainage (or back in clean nursery pot).
- Water just enough to settle the mix into the roots; then leave it dry down to the preferences of your plant before watering again.”
“Bad as it looks for your plant, if most of the roots are gone, your recovery of the plant may be limited. Try taking cuttings from healthy stems of the house plant; it may save you a year’s wait for the
next flowering stem.”Check just a bit more if you suspect problems (like root rot or soggy soil):
- Let the pot drain and dry out.
- Take it out of the pot to inspect the roots. Do they look healthy? Pristine white versus mushy brown? Healthy roots are much less likely to rot. However, this also means potted plants with fewer roots (such as choosing to grow a plant slightly potbound) tend to suffer less. The environment in the pot can stay beneficially aerated and not soggy.
- Make a note of what you observe in terms of drainage / root activities, and take action. It could be that you need to repot and/or change the kind of drainage hole to be more conducive to peppy roots.
Let’s dig into other common drainage, and what to do!
Common drainage mistakes (with fast fixes)
| Mistake | What you’ll notice | Fix |
|---|---|---|
| Pot sits in water (saucer/cachepot) | Mix stays wet too long; fungus gnats; leaning; musty odor | Drain at the sink; empty saucer/cachepot after 10-15 minutes; cut chunk out of bottom of cachepots so pot is elevated with spacer/riser inside |
| Overpotting | Plant suffers even though you don’t “water that often” | Down-size to pot closer to meat of root-ball; an “airier” mix (a little chunky) |
| Compacted/or OLD mix | Water runs down sides or still swampy | Re-pot with fresh mix and break-up circling-roots; don’t pack down hard |
| Blocked or sealed drainage-hole terminal-to-terminal against flat surface | No or little water exit; pot feels heavy | Clear holes; add “pot feet” etc. outdoors; keep air gap underneath base |
| Rocks at bottom | Lingering wet-root issues; full of myself? Not a LOT of room for roots | Rip ‘em out next re-pot or use mesh over hole instead. |
A quick “drainage check” you can do now:
- Pick your most frustrating pot (the one that always looks droopy/in baby yellow mode/sluggish).
- Water FULLY over sink or bowl.
- Confirm that at least some water exits the hole(s) in a minute or two.
- Let drain for 10 minutes to 15 minutes, then empty all the water you’ve caught.
- Lift the pot: get to know its “just-watered weight.” Recheck each day. When it feels significantly lighter than that and about as dry as your plant prefers, you’ve found its watering interval for your house, right now.
FAQ
Do all houseplants need drainage holes?
Most will survive longer, with less risk of soaked roots, if their pots have drainage holes. There are specialty self-watering systems (NASDAQ:SWIY) designed for drainage, some of which do not incorporate a traditional drainage hole, and water management/airing is mission control in those systems. For your average houseplant pot made of frequently unintentional porosity (i.e. garden stores) and average potting mix, a hole (or more) is safest.
How many drainage holes is a good number?
At least the hole in the bottom of the pot are required for portability of small pots, but more holes usually decreases the risk that a single blockage will be head chompingly problematic. More important than quantity of holes is that water can get out and isn’t pool-side in the local drainage n’ diving club.
What if I fall in love with the pot that does not drain?
Use it as a cachepot! Leave the plant in its nursery pot with holes, water that pot separately, let it drain completely, and only then return it. This gives you the look you want, with far less plant murder risk.
What’s up with my plant looking thirsty even though the soil feels moist?
That happens sometimes when those roots are stressed or seriously rotting due to lack of oxygen in the mix. Even if there is plenty of moisture present, the roots are either not fetching it or can’t fetch it in direction of garden. The fix is clarity of path for water, and adjusting your watering style, not more water. [4]
References
Missouri Botanical Garden — Overwatering [URL_0]
Royal Horticultural Society (RHS) — Growing plants in containers (problem-solving: waterlogging, drainage holes, pot fee [URL_1]
Missouri Botanical Garden — Indoor plant brown tips FAQ (drainage/leaching and discarding drained water) [URL_2]
The Spruce — Should You Put Rocks at the Bottom of a Planter? (why it doesn’t improve drainage) [URL_3]
Missouri Botanical Garden — Gardening Boo-boos (roots need air; waterlogging problems) [URL_4]